DIY Chest Freezer Ice Bath: Crafting Your Cold Therapy Space

Are you searching for an affordable and efficient way to incorporate cold therapy benefits into your wellness routine? Look no further! In this article, we’ll explore a fascinating DIY project that will enable you to create your very own chest freezer ice bath – a personal cold therapy space right in the comfort of your own home. Join us as we delve into the ins and outs of crafting your ultimate chill-out zone, providing you with the know-how to optimize your cold therapy experience. With our step-by-step guidance and expert tips, you’ll soon be enjoying the invigorating benefits of cold therapy in a space tailored to your needs. Let’s embark on this chilly adventure together and unlock the gateway to a refreshing journey of improved well-being!
Contents
- 1. Choosing the Right Chest Freezer: Creating the Ideal Cold Therapy Environment
- 2. Essential Supplies: Setting Up Your DIY Ice Bath for Effective Cold Therapy
- 3. Optimizing Temperature Control: Maintaining Consistent Cold Conditions for Maximum Benefits
- 4. Navigating Safety Measures: Precautions and Guidelines for a Secure Ice Bath Experience
- 5. Adding Accessories for Comfort: Enhancing Your Ice Bath with Cushions, Pillows, and More
- 6. Elevating the Experience: Incorporating Aromatherapy and Music in Your Cold Therapy Space
- 7. Maintaining Hygiene: Proper Cleaning and Maintenance of Your Chest Freezer Ice Bath
- 8. Customizing Your Ice Bath: Personalizing the Space to Suit Your Cold Therapy Preferences
- 9. Expanding the Benefits: Exploring Additional Uses of Your DIY Chest Freezer Ice Bath
1. Choosing the Right Chest Freezer: Creating the Ideal Cold Therapy Environment
Choosing the right chest freezer is crucial when creating an ideal cold therapy environment for your DIY chest freezer ice bath. With the right freezer, you can ensure that your cold therapy space maintains the optimal temperature for maximum benefits. Here are some factors to consider when selecting a chest freezer:
-
Size and Capacity: Determine the amount of space you have available for your ice bath setup and the number of individuals who will be using it. Look for a chest freezer that can accommodate the number of ice bath participants comfortably.
-
Temperature Control: Opt for a chest freezer with adjustable temperature settings. This allows you to customize the level of cold therapy based on your needs and preferences. Look for freezers that have temperature ranges suitable for cold therapy, typically between -10°C to -20°C (14°F to -4°F).
-
Energy Efficiency: Consider the energy efficiency of the chest freezer to minimize electricity consumption. Look for models with an Energy Star rating or those that feature energy-saving functions such as LED lighting and improved insulation.
-
Construction and Design: Choose a chest freezer made from durable materials to withstand the demands of cold therapy. Look for features such as a solid lid, interior shelving, and removable baskets for easy organization and access to ice bath supplies.
- Noise Level: Some chest freezers can be noisy, which may disrupt the tranquility of your cold therapy space. Consider models with noise-reducing features or look for reviews that mention quieter operation.
To help you make an informed decision, here is a comparison table showing the key specifications of three popular chest freezers for cold therapy:
| Model | Capacity (Liters) | Temperature Range (°C) | Energy Efficiency | Noise Level (dB) |
|---|---|---|---|---|
| A | 200 | -10 to -25 | Energy Star | 41 |
| B | 250 | -15 to -30 | Low Energy | 38 |
| C | 180 | -5 to -20 | Energy Star | 45 |
Remember, choosing the right chest freezer is essential for creating an optimal cold therapy environment. Consider your specific needs, preferences, and available space to select the best option for your DIY chest freezer ice bath.
2. Essential Supplies: Setting Up Your DIY Ice Bath for Effective Cold Therapy
Creating your own DIY ice bath is an excellent way to enjoy the benefits of cold therapy from the comfort of your own home. One of the most popular options is using a chest freezer to set up your very own ice bath. Not only is it cost-effective, but it also provides enough space to fully immerse your body for maximum therapeutic effects.
When setting up your DIY ice bath, there are a few essential supplies you’ll need to ensure an effective and enjoyable experience. Firstly, you’ll need a chest freezer large enough to accommodate your body comfortably. Look for a model with a drain plug for easy water removal. Additionally, you’ll need a reliable thermometer to monitor the water temperature and ensure it stays within the desired range.
To enhance your cold therapy experience, consider adding accessories such as a waterproof timer to help you track your immersion time, a non-slip mat to prevent accidents, and a waterproof pillow for added comfort. These small additions can make a big difference in your overall enjoyment and adherence to your cold therapy routine.
- Essential supplies for your DIY ice bath:
- Chest freezer with drain plug
- Reliable thermometer
- Waterproof timer
- Non-slip mat
- Waterproof pillow
With these supplies in hand, you’ll be ready to set up your DIY ice bath and embark on your cold therapy journey. Remember to start with shorter immersion times and gradually increase the duration as your body adjusts to the cold. Stay consistent, listen to your body, and enjoy the numerous benefits that cold therapy can bring to your health and well-being.

3. Optimizing Temperature Control: Maintaining Consistent Cold Conditions for Maximum Benefits
When it comes to cold therapy, maintaining consistent cold conditions is crucial for achieving maximum benefits. One effective solution is creating your own DIY chest freezer ice bath, which provides a dedicated space for your cold therapy needs. By optimizing temperature control, you can ensure that your body receives the full therapeutic potential of cold therapy.
To craft your cold therapy space, start by selecting a suitable chest freezer that can accommodate your needs. Look for a model with adjustable temperature settings and a spacious interior. Consider the size and dimensions, ensuring it can comfortably fit the body parts you intend to target with cold therapy.
Once you’ve acquired the chest freezer, it’s time to create the optimal environment for cold therapy. Here are some key tips:
- Insulation: Insulate the interior of the chest freezer using foam boards or insulation panels. This helps to maintain a consistent temperature and prevent cold air leakage.
- Temperature Regulation: Use a thermometer to monitor and adjust the temperature according to your desired cold therapy range. Aim for a temperature between 32°F and 50°F (0°C to 10°C) for most cold therapy applications.
- Water Depth: Fill the chest freezer with water to the desired depth, typically reaching the level where your body will be exposed during cold therapy. Ensure there is enough space for movement and comfort.
- Additives: Consider adding ice packs or ice cubes to the water to enhance the cooling effect. Experiment with different amounts to find the ideal balance for your needs.
By following these steps, you can optimize temperature control in your DIY chest freezer ice bath, creating a consistent and effective cold therapy environment. Remember to always prioritize safety and consult a healthcare professional if you have any concerns or specific medical conditions. Stay cool, stay therapeutic!

When it comes to immersing yourself in an ice bath, safety should always be a top priority. To ensure a secure and enjoyable experience, it’s crucial to follow certain precautions and guidelines. Here are some essential tips to keep in mind:
1. Start Slow and Gradually Increase Cold Exposure
When you first begin your ice bath journey, it’s important to start slowly and allow your body to acclimate to the cold. Begin with a shorter duration and gradually increase the time as your tolerance builds. This approach will help prevent shock to your system and minimize the risk of hypothermia or cold-related injuries.
2. Monitor Water Temperature
Before jumping into the ice bath, always check the water temperature. It should be between 50-59°F (10-15°C). Use a reliable thermometer to ensure accuracy. Remember, extreme cold temperatures can be dangerous, so be cautious and never expose yourself to freezing water.
3. Never Go Alone
Having someone present while you take an ice bath is crucial for your safety. In case of any discomfort or emergencies, they can assist you immediately, ensuring a timely response and preventing potential accidents.
4. Stay Hydrated and Listen to Your Body
While in the ice bath, pay attention to your body’s signals. If you feel numbness, tingling, excessive shivering, or extreme discomfort, it’s important to exit the bath immediately. Stay hydrated by sipping warm fluids before and after the session to help regulate your body temperature.
5. Gradual Warming Up and Proper Post-Ice Bath Care
After your ice bath, don’t rush to warm up. Allow your body to gradually warm itself by dressing in warm layers and avoiding sudden temperature changes. You can also try gentle physical activity or stretching to encourage blood circulation. It’s equally vital to ensure proper post-ice bath care, such as minimizing exposure to cold environments for the next few hours and avoiding alcohol consumption.
Following these precautions and guidelines will help you create a secure and enjoyable ice bath experience. Remember, ice baths can have numerous benefits, but taking care of your safety is paramount. Stay knowledgeable, listen to your body, and enjoy the journey of cold therapy!
5. Adding Accessories for Comfort: Enhancing Your Ice Bath with Cushions, Pillows, and More
Once you have set up your DIY chest freezer ice bath for cold therapy, you can take it to the next level by adding accessories for comfort. Enhancing your ice bath with cushions, pillows, and more can make your cold therapy experience even more enjoyable.
1. Cushions: Adding cushions to your ice bath can provide extra comfort and support. Place a waterproof cushion at the bottom of the freezer to create a cushioned surface to sit on. This will help prevent any discomfort from the cold temperature and make your cold therapy session more relaxing.
2. Pillows: To further enhance your comfort, consider adding pillows to support your head and neck. Place a small waterproof pillow at the top of the freezer, providing a soft resting place for your head. This will allow you to comfortably relax during your ice bath session.
3. Blanket or Towel: Wrapping yourself in a warm blanket or towel before entering the ice bath can help retain body heat and provide extra insulation. This will keep you warm and cozy during your cold therapy session.
4. Entertainment: If you prefer some entertainment during your ice bath, consider placing a waterproof Bluetooth speaker near the ice bath. You can listen to your favorite relaxing music, audiobooks, or podcasts to enhance your experience.
Remember, it’s important to prioritize your comfort and safety while using these accessories. Ensure that all accessories are waterproof and won’t be damaged by the cold temperature or water. Always consult with a healthcare professional before starting any cold therapy routine. Stay warm, comfortable, and make the most of your ice bath experience!
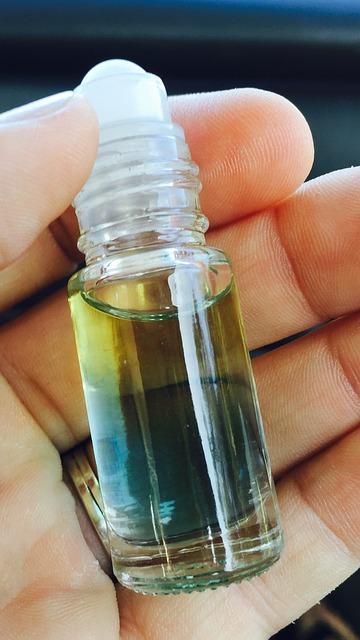
6. Elevating the Experience: Incorporating Aromatherapy and Music in Your Cold Therapy Space
Incorporating aromatherapy and music in your cold therapy space can take your experience to a whole new level. Not only will it enhance relaxation and create a serene ambiance, but it can also provide additional benefits to your overall well-being.
Aromatherapy, the use of essential oils, can be easily integrated into your DIY chest freezer ice bath routine. By adding a few drops of calming lavender or invigorating peppermint oil to your bathwater, you can promote relaxation or increase alertness depending on your preference. The soothing scent will envelop you as you immerse yourself in the icy waters, creating a multi-sensory experience that is both refreshing and blissful.
Similarly, music can have a profound impact on your cold therapy session. By carefully selecting a playlist that matches your mood or desired mental state, you can immerse yourself in a cocoon of sound that complements the physical experience of the ice bath. Whether it’s gentle classical music to calm the mind or upbeat tunes to energize your body, the right soundtrack can elevate your cold therapy space into a personal sanctuary of healing and rejuvenation.
As you embrace the DIY approach to crafting your cold therapy space, don’t overlook the power of aromatherapy and music. Experiment with different scents and genres to find the perfect combination that resonates with you. Transform your ice bath routine into a truly immersive and transformative experience that nurtures both your body and soul.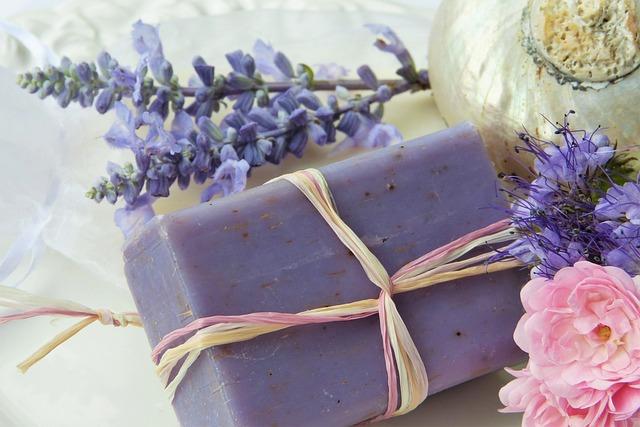
7. Maintaining Hygiene: Proper Cleaning and Maintenance of Your Chest Freezer Ice Bath
Proper cleaning and maintenance are essential to ensure the longevity and efficiency of your chest freezer ice bath. Regular upkeep helps maintain hygiene, prevents unpleasant odors, and ensures that your cold therapy space remains safe and functional. Here are some tips to help you keep your ice bath in top condition:
1. Clear out regularly: Empty your chest freezer ice bath at least once a month to remove any accumulated ice or debris. This prevents the growth of bacteria and mold, keeping your ice bath clean and fresh.
2. Thorough cleaning: After emptying the ice bath, wipe down the interior with a mixture of mild detergent and warm water. Use a soft cloth or sponge to remove any dirt or residue. Avoid using harsh chemicals or abrasive materials that may damage the surfaces.
3. Disinfection is key: To ensure optimal hygiene, regularly sanitize your ice bath. You can use a mixture of equal parts water and vinegar, or a diluted bleach solution, to kill any potential bacteria or viruses. Remember to rinse thoroughly after disinfecting.
4. Seal it tight: Check the gasket or seal around the lid of your chest freezer ice bath. Over time, it may wear out or become loose, leading to temperature fluctuations and increased energy consumption. If necessary, replace the gasket to maintain a proper seal.
5. Organize and label: Keep your ice bath organized by using labeled containers or bags for different items. This helps prevent cross-contamination and makes it easier to find what you need. Utilize dividers or bins to separate different categories of products, such as ice packs or cold therapy accessories.
By following these cleaning and maintenance practices, you can ensure that your chest freezer ice bath remains a reliable and hygienic space for your cold therapy needs. Take the time to care for your ice bath, and it will continue to provide you with the chilly relief you seek.
8. Customizing Your Ice Bath: Personalizing the Space to Suit Your Cold Therapy Preferences
When it comes to customizing your ice bath, the possibilities are endless. By personalizing the space to suit your cold therapy preferences, you can create a truly unique and enjoyable experience. Whether you are using a DIY chest freezer or a dedicated ice bath tub, here are a few ideas to help you get started:
- Select the perfect location: Find a spot in your home or backyard where you can easily access and enjoy your ice bath. Consider privacy, convenience, and ambient temperature.
- Add comfortable seating: Make your ice bath experience more relaxing by adding cushions, pillows, or even a waterproof chair. This will allow you to sit comfortably and enjoy the benefits of cold therapy for longer periods of time.
- Create a calming ambiance: Set the mood by adding soft lighting, scented candles, or soothing music. This will help you relax and fully immerse yourself in the cold therapy session.
- Accessorize with essentials: Keep everything you need within arm’s reach. Consider adding a small table or shelf to hold towels, books, a timer, or any other items you may want during your ice bath.
By customizing your ice bath space, you can enhance your cold therapy experience and make it a personal retreat. It’s important to note that everyone’s preferences are unique, so feel free to experiment and find what works best for you. Remember to always listen to your body and consult with a medical professional if you have any concerns or medical conditions.

9. Expanding the Benefits: Exploring Additional Uses of Your DIY Chest Freezer Ice Bath
Now that you have successfully created your DIY chest freezer ice bath, it’s time to think beyond the traditional uses and discover the endless possibilities this cold therapy space can offer. Whether you are an athlete looking to enhance your recovery or someone seeking relief from chronic pain, here are a few additional ways to make the most of your ice bath:
- Heat and Cold Contrast Therapy: Take your cold therapy to the next level by combining it with heat therapy. Alternate between the ice bath and a warm compress or sauna to maximize the benefits of both hot and cold therapy. This contrast therapy can help improve circulation, reduce inflammation, and enhance overall muscle recovery.
- Aromatherapy: Enhance your relaxation experience by adding essential oils or aromatic herbs to your ice bath. Lavender, eucalyptus, and chamomile are known for their soothing properties and can help calm both your mind and body. This aromatic ice bath can provide a refreshing and rejuvenating experience, leaving you feeling invigorated and at peace.
- Stretching and Mobility Exercises: Utilize your ice bath as a space for stretching and improving your mobility. The cold temperature can help enhance flexibility and reduce muscle stiffness, allowing you to perform a wider range of stretching exercises with ease. Incorporate gentle movements and stretches to promote joint health and relieve muscle tension.
Remember, these additional uses are just the tip of the iceberg. Feel free to get creative and experiment with different ideas that align with your personal needs and preferences. With your DIY chest freezer ice bath, you have the flexibility to customize your cold therapy space and unlock its full potential.
In conclusion, creating your own DIY chest freezer ice bath is not only a cost-effective solution for cold therapy, but also an incredibly rewarding project. By following the steps outlined in this article, you can now craft your very own cold therapy space right in the comfort of your home. Whether you’re looking to recover from intense workouts, soothe muscle soreness, or simply enjoy the many health benefits cold therapy has to offer, this DIY ice bath is the perfect addition to your wellness routine. So go ahead, unleash your creativity, and get ready to experience the invigorating power of cold therapy like never before.